


LED Light Connectors ensure secure and efficient electrical connections for LED lighting systems. They come in various types to suit different needs.
LED light connectors are essential for maintaining the functionality and longevity of LED lighting systems. These connectors provide a reliable and secure way to connect LED strips, modules, or fixtures to power sources and controllers. With various types available, such as solderless connectors, snap connectors, and waterproof connectors, users can find the perfect match for their specific lighting setup.
Proper use of LED light connectors ensures optimal performance, reducing the risk of electrical failures and enhancing the overall lighting experience. They are easy to install, making them a preferred choice for both professionals and DIY enthusiasts.
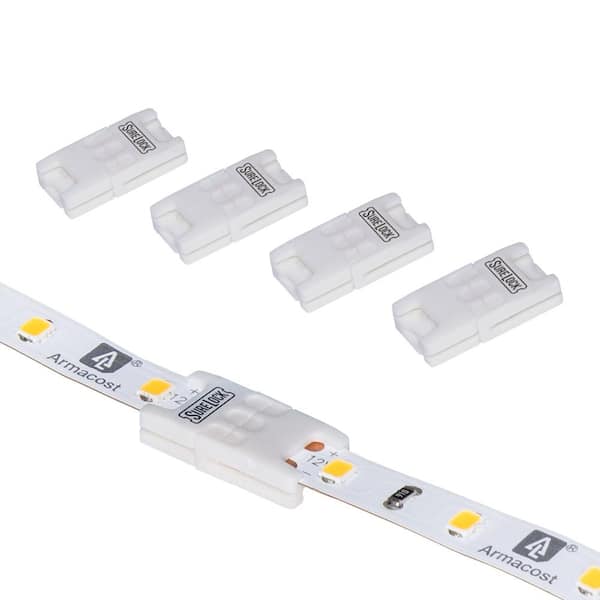
Credit: Homedepot
Introduction To LED Light Connectors
LED light connectors are essential for LED lighting systems. They ensure a secure and stable connection. This helps in delivering consistent power to your LED lights. Let’s dive into why connectors matter and the types available.
Why Connectors Matter
Connectors play a crucial role in LED lighting. They provide a reliable connection. They prevent flickering or dimming of lights. Connectors also make installation easy. This saves time and reduces errors. Proper connectors ensure safety. They reduce the risk of short circuits or electrical fires.
Types Of Connectors
There are various types of LED connectors. Each type serves a different purpose. Here are some common ones:
| Connector Type | Use Case |
|---|---|
| Strip-to-Strip Connectors | Connects two LED strips together |
| Strip-to-Wire Connectors | Connects LED strips to power wires |
| Wire-to-Wire Connectors | Joins two separate wires |
| DC Connectors | Connects LED lights to a DC power source |
Here is an ordered list of steps to choose the right connector:
- Identify your LED light type.
- Check the voltage and current requirements.
- Select a compatible connector type.
Using connectors is straightforward. Follow the instructions for a seamless connection. This ensures your LED lights work efficiently.
Selecting The Right Connector
Choosing the right LED light connector is crucial for ensuring seamless performance. The connector you select determines the efficiency and longevity of your LED lighting system. This section will guide you through the essential factors to consider.
Compatibility Factors
Ensuring compatibility is the first step. Check if the connector matches the voltage requirements of your LED lights. Using the wrong voltage can damage the lights or the connector.
Next, consider the pin configuration. LED lights come with different pin setups. Ensure the connector matches the pin layout of your LED lights.
Size and shape also matter. Connectors come in various shapes and sizes. Verify that the connector fits the physical dimensions of your LED lights.
Connector Materials
The material of the connector affects its durability. Look for connectors made from high-quality plastics or metals. These materials resist wear and tear better.
Consider the conductivity of the materials used. Metals like copper and gold offer better conductivity. This ensures efficient power transfer to your LED lights.
Lastly, check for corrosion resistance. Materials resistant to corrosion last longer. This is especially important for outdoor LED installations.
Tools Needed For Installation
Installing LED light connectors can be simple with the right tools. Proper tools ensure a secure connection and long-lasting performance. Let’s explore the essential tools and safety equipment needed for a smooth installation.
Essential Tools
Here are the essential tools needed for installing LED light connectors:
- Wire Strippers: Strips the insulation from wires cleanly.
- Screwdrivers: Tightens screws to secure the connectors.
- Pliers: Holds, bends, and cuts wires as needed.
- Multimeter: Checks voltage to ensure proper connections.
- Heat Gun: Shrinks heat-shrink tubing for insulation.
Safety Equipment
Safety is crucial when working with electrical components. Use the following safety equipment:
- Safety Glasses: Protects your eyes from debris and sparks.
- Insulated Gloves: Prevents electrical shocks while handling wires.
- Dust Mask: Protects from inhaling particles while cutting wires.
- Fire Extinguisher: Handy in case of electrical fires.
Having the right tools and safety equipment makes the installation of LED light connectors easy. Always prioritize safety to ensure a successful project.
Preparing For Installation
Proper preparation ensures a smooth installation of LED light connectors. This section helps you get ready with the right steps.
Measuring And Cutting
Before starting, gather your tools: a tape measure and a sharp cutting tool. Accurate measurements avoid mistakes. Measure the length of wires needed for the LED lights. Use the tape measure for precise results.
Mark the measured points carefully. This ensures straight cuts. Use a sharp cutting tool to cut the wires at marked points. Cut firmly for clean edges. Clean edges ensure better connections.
Stripping Wires
After cutting, strip the wires. Use a wire stripper tool. Place the wire in the stripper’s notch. Gently squeeze and pull to remove insulation. Expose about half an inch of the wire.
Check the exposed wire. Ensure no strands are damaged. Twist the exposed strands together. This improves the connection.
Follow these steps for a successful LED light connector installation. Proper preparation saves time and ensures a solid connection.
Connecting Led Strips
Connecting LED strips can transform any space with vibrant light. Whether for home decor or professional setups, knowing how to connect these strips is crucial. This guide covers soldering and solderless methods and common mistakes to avoid.
Soldering Vs. Solderless
Connecting LED strips involves two main methods: soldering and solderless. Each has its pros and cons.
| Method | Pros | Cons |
|---|---|---|
| Soldering | Strong connectionReliable over time | Requires soldering toolsNeeds practice |
| Solderless | Easy to useNo special tools needed | Less reliableProne to disconnects |
Soldering provides a permanent and durable connection. It involves using a soldering iron and solder wire to join the LED strip contacts. This method requires some skill and practice but ensures a reliable connection.
Solderless connectors are easy to use and don’t need special tools. They clip onto the LED strip’s contacts, making them quick to set up. However, they might not be as reliable as soldered connections.
Common Mistakes
Connecting LED strips can be easy, but mistakes happen. Here are some common errors and how to avoid them:
- Incorrect Polarity: Ensure the positive and negative sides match.
- Loose Connections: Make sure connections are tight and secure.
- Overloading Strips: Avoid connecting too many strips in series.
- Poor Soldering: Practice soldering to avoid cold solder joints.
- Wrong Connectors: Use connectors compatible with your LED strips.
Ensuring correct polarity is crucial. Always match the positive and negative sides correctly. Loose connections can cause flickering or failure. Make sure all connections are tight and secure.
Overloading LED strips can lead to overheating. Avoid connecting too many strips in series. Poor soldering can result in weak connections. Practice soldering to avoid cold solder joints. Using the wrong connectors can cause issues. Ensure the connectors are compatible with your LED strips.
Waterproof Connectors
Waterproof connectors are essential for outdoor LED lighting systems. These connectors protect against moisture and water damage. Ensuring your LED lights last longer and work efficiently.
Importance Of Waterproofing
Waterproofing is crucial for LED light connectors. Without proper waterproofing, water can seep into the connectors. This can cause short circuits and other issues.
Waterproof connectors prevent corrosion. They ensure a reliable and safe connection. This is especially important for outdoor settings. Rain, snow, and humidity can damage non-waterproof connectors quickly.
Waterproof connectors also help in maintaining the performance of the LED lights. They ensure consistent brightness and functionality.
Installation Tips
Installing waterproof connectors is straightforward. Follow these tips for the best results:
- Choose the right connector for your LED light type.
- Ensure the connector’s IP rating matches your needs. Higher IP ratings offer better waterproofing.
- Use proper tools for installation. Avoid damaging the connector or the wires.
- Seal all connections properly. Use waterproof tape if needed.
- Check for loose connections. Tighten them to prevent water ingress.
Refer to the table below for quick tips:
| Step | Action |
|---|---|
| 1 | Choose the right connector |
| 2 | Check the IP rating |
| 3 | Use proper tools |
| 4 | Seal connections |
| 5 | Check for loose connections |
By following these tips, you ensure a secure and waterproof connection. Your LED lights will perform better and last longer.
Connecting Multiple Strips
Connecting multiple LED light strips can be tricky. Understanding the right methods ensures a seamless, bright display. In this section, we will explore the differences between connecting strips in series and parallel. We will also discuss essential power considerations to keep in mind.
Series Vs. Parallel
There are two primary ways to connect multiple LED strips: series and parallel.
- Series Connection: In a series connection, one strip is connected to the next in a single line.
- Parallel Connection: In a parallel connection, each strip is connected directly to the power source.
| Series Connection | Parallel Connection |
|---|---|
| Voltage drops along the strips.Brightness can decrease at the end.Simple wiring. | Consistent brightness.Requires more wiring.Each strip gets full voltage. |
Power Considerations
Ensuring proper power for your LED light strips is crucial. Here’s what you need to consider:
- Calculate the total wattage of all strips.
- Ensure your power supply can handle the total wattage.
- Use a power supply with at least 20% more capacity than needed.
Using a power supply with extra capacity extends its lifespan. It also prevents overheating and ensures consistent performance.
Connector Maintenance
Maintaining your LED light connectors ensures long-lasting performance and safety. Proper care helps prevent malfunctions and extends the lifespan of your lighting system. Below are some essential tips for cleaning and replacing your connectors.
Cleaning Tips
Regular cleaning keeps your connectors in top condition. Dust and grime can affect connections. Follow these steps to clean your LED light connectors:
- Turn off the power before cleaning.
- Use a soft, dry cloth to wipe away dust.
- For stubborn dirt, use a cloth slightly dampened with water.
- Ensure connectors are completely dry before reconnecting.
- Avoid using harsh chemicals or abrasive materials.
Replacement Guidelines
Sometimes, cleaning is not enough. Faulty connectors need replacement to ensure proper function. Here are some guidelines for replacing your LED light connectors:
- Turn off the power supply.
- Disconnect the old connector carefully.
- Inspect the wires for any damage.
- Connect the new connector securely.
- Ensure proper insulation to prevent short circuits.
- Test the new connector by turning the power back on.
Replacing damaged connectors promptly prevents further issues.
Follow these maintenance tips to keep your LED light connectors working efficiently. Regular care ensures a reliable and long-lasting lighting system.
Troubleshooting Common Issues
Using LED light connectors can sometimes lead to issues. This guide helps you fix common problems quickly and easily. Below are some tips to troubleshoot and solve these issues.
Flickering Lights
Flickering lights can be annoying and may indicate a problem. Here are some steps to troubleshoot flickering lights:
- Check Power Supply: Ensure the power supply is stable and sufficient.
- Inspect Connectors: Make sure all connectors are securely attached.
- Replace Faulty Components: Sometimes, replacing a faulty LED or connector solves the issue.
If the lights still flicker, consider testing with a different power source. This helps to identify if the issue is with the power supply.
Loose Connections
Loose connections can cause lights to stop working. Follow these steps to check for loose connections:
- Turn Off Power: Ensure the power is off before inspecting connections.
- Check Each Connector: Go through each connector and ensure it is tight.
- Secure Loose Wires: Tighten any loose wires or connectors you find.
Using a table can help you keep track of each connection:
| Connection Point | Status |
|---|---|
| Connector 1 | Secure |
| Connector 2 | Loose |
| Connector 3 | Secure |
Ensure all connections are secure before turning the power back on.
Credit: hitlights.com
Advanced Installation Tips
Installing LED light connectors can be easy. With advanced installation tips, you can achieve a professional look. These tips help with custom lengths and complex layouts.
Custom Lengths
Creating custom lengths for LED light connectors enhances flexibility. You can design your lighting to fit any space. Follow these steps for precise cuts:
- Measure the desired length of the LED strip.
- Mark the cutting line on the strip using a pencil.
- Use sharp scissors to cut along the marked line.
- Attach a connector at the cut end.
Always cut along the marked lines. This ensures proper connectivity. Use strong adhesive tape to secure the strip.
Complex Layouts
Complex layouts require careful planning. They can create unique lighting effects. Follow these tips to manage complex layouts:
- Plan Your Layout: Sketch your layout on paper first.
- Use Corner Connectors: These help navigate sharp corners.
- Install Power Boosters: Use these to maintain brightness over long distances.
Avoid overlapping LED strips. Overlapping can cause overheating. Use mounting clips to hold the strips in place.
Refer to this table for quick tips:
| Task | Tool | Tip |
|---|---|---|
| Cutting LED Strips | Sharp Scissors | Cut along marked lines |
| Navigating Corners | Corner Connectors | Use for sharp angles |
| Maintaining Brightness | Power Boosters | Install every 5 meters |
By following these tips, you can achieve a professional installation. LED light connectors can transform any space with ease.
Choosing Quality Connectors
Choosing the right LED light connectors is crucial. They ensure your LED lights work efficiently. Quality connectors prevent issues and extend the life of your lights. In this section, we’ll explore top brands and key quality indicators.
Brand Recommendations
Some brands stand out for their reliability and quality. Here are a few trusted names:
- TE Connectivity: Known for durable and reliable connectors.
- Amphenol: Offers a wide range of high-quality connectors.
- Molex: Provides connectors that are easy to install and long-lasting.
- Wago: Known for their innovative and safe connector designs.
Quality Indicators
Identifying quality connectors involves checking specific indicators. Here are the key points to consider:
| Indicator | Description |
|---|---|
| Material | Look for connectors made from durable materials like copper or brass. |
| Contact Resistance | Low contact resistance ensures efficient power transfer. |
| Temperature Rating | Check the temperature rating to match your LED’s operating conditions. |
| Safety Certifications | Certifications like UL or CE indicate a high safety standard. |
| Ease of Installation | Choose connectors that are easy to install and maintain. |

Credit: www.amazon.com
Dimmable Led Connectors
Dimmable LED connectors offer flexibility in lighting. These connectors are essential for creating adjustable lighting environments. They work with various dimmer switches and provide a seamless lighting experience. Understanding their compatibility and installation is crucial for optimal performance.
Compatibility With Dimmers
Not all LED connectors are compatible with every dimmer. Check the connector specifications before purchasing. Ensure your dimmer switch supports LED technology. Some dimmers only work with incandescent or halogen bulbs. Using the wrong dimmer can lead to flickering or failure.
Here is a simple compatibility checklist:
- Verify the dimmer’s compatibility with LED lights.
- Check the connector’s voltage rating.
- Look for connectors designed for dimmable LEDs.
Consult the manufacturer’s guide for compatibility details. This will help you avoid issues.
Installation Tips
Installing dimmable LED connectors is straightforward. Follow these steps for a smooth installation:
- Turn off the power supply to the lighting circuit.
- Connect the LED to the dimmable connector.
- Attach the connector to the dimmer switch.
- Secure all connections tightly.
- Turn the power back on and test the setup.
Here are some additional tips:
- Use insulated tools for safety.
- Avoid overloading the circuit with too many lights.
- Check for any loose connections before finalizing.
Proper installation ensures a longer lifespan for your dimmable LED setup.
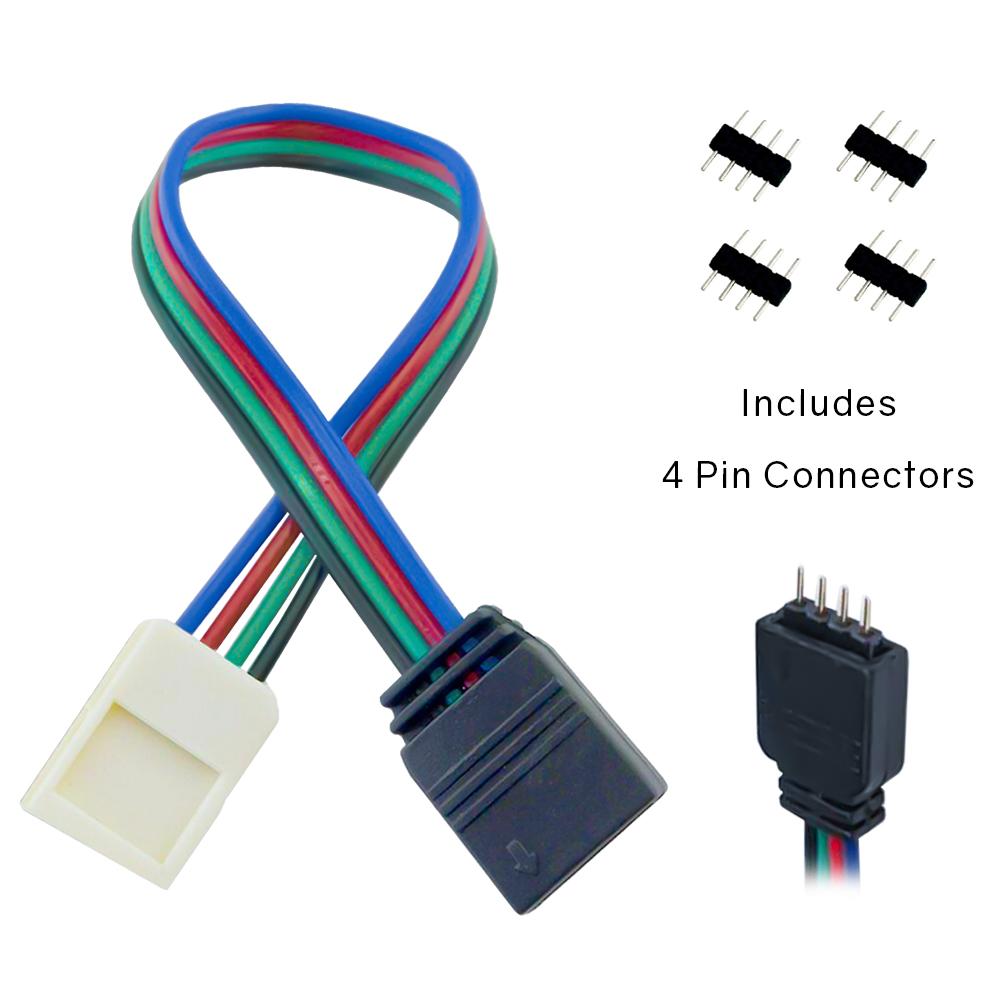
Rgb Led Connectors
RGB LED connectors are vital for connecting RGB LED strips. They allow for easy installation and color control. You can create stunning lighting effects using these connectors. Let’s explore how to control colors and some useful wiring tips.
Color Control
With RGB LED connectors, you can control colors with ease. Each connector supports red, green, and blue channels. This allows for a wide range of color combinations. You can create vibrant displays using a remote or an app.
Using a remote, you can change colors instantly. Many remotes come with preset colors and modes. Apps provide even more flexibility. You can customize colors, brightness, and patterns. This makes RGB LED connectors perfect for any occasion.
Wiring Tips
Proper wiring ensures your RGB LED strips work efficiently. Here are some tips to help you:
- Use connector clips for easy and secure connections.
- Ensure the polarity matches on both ends of the connector.
- Keep the power supply close to the LED strips.
- Use heat shrink tubing to protect exposed wires.
- Avoid bending the LED strip at sharp angles.
Follow these tips for a smooth installation process. Proper wiring ensures your LED strips last longer and perform better.
Outdoor Led Installations
Outdoor LED installations brighten up spaces beautifully. They are energy-efficient and long-lasting. For a successful installation, using the right connectors is crucial.
Weatherproof Connectors
Weatherproof connectors protect your LED lights from rain, snow, and dust. They ensure your lights work well in all weather conditions.
Here is a table showcasing different types of weatherproof connectors:
| Connector Type | Protection Level | Best For |
|---|---|---|
| Silicone-Sealed | High | Heavy Rain Areas |
| Rubber Gasket | Medium | Moderate Weather |
| Plastic Casing | Low | Dry Areas |
Environmental Considerations
Environmental considerations are vital for outdoor LED installations. Ensure the connectors are eco-friendly. Choose materials that are recyclable and non-toxic.
- Use connectors made of recyclable plastic.
- Opt for non-toxic materials to prevent soil contamination.
- Consider connectors with low carbon footprint.
By making these choices, you help protect the planet while enjoying beautiful lighting.
Connector Cost Considerations
Choosing the right LED light connectors involves understanding cost considerations. Different connectors have different price points. The cost depends on materials, durability, and brand. This section will help you understand the options available.
Budget Options
For those on a tight budget, there are affordable LED light connectors. These connectors are typically made from basic materials. They may not last as long as premium choices.
- Materials: Plastic or standard metal
- Durability: Moderate
- Price Range: $1 – $5 per connector
Budget connectors are ideal for small projects. They work well for temporary installations. They offer a cost-effective solution for simple needs.
Premium Choices
Premium LED light connectors offer high-quality materials and durability. These connectors are often made from robust metals. They provide a long-lasting solution.
- Materials: High-grade metal or specialized plastic
- Durability: High
- Price Range: $10 – $20 per connector
Premium choices are best for permanent installations. They ensure a secure and reliable connection. They are perfect for professional setups or large projects.
| Connector Type | Material | Durability | Price Range |
|---|---|---|---|
| Budget | Plastic or standard metal | Moderate | $1 – $5 |
| Premium | High-grade metal or specialized plastic | High | $10 – $20 |
Diy Vs. Professional Installation
Deciding between DIY and professional installation for LED light connectors can be tricky. This section will guide you through the pros and cons and help you know when to hire a pro.
Pros And Cons
| DIY | Professional Installation |
|---|---|
| Cost-effectiveLearn new skillsImmediate satisfaction | Expert finishLess time-consumingWarranty and support |
| Risk of mistakesTime-intensiveNeed for tools | Higher costScheduling neededLess personal involvement |
When To Hire A Pro
Consider hiring a pro if:
- You lack the necessary tools.
- The project is too complex.
- You want a polished finish.
- You have a tight schedule.
- Warranty is important to you.
Innovative Connector Designs
In the world of LED lighting, innovative connector designs are transforming the way we think about lighting setups. These designs offer new levels of flexibility, efficiency, and ease of use. Let’s explore some of the latest trends and future developments in this exciting field.
Latest Trends
LED light connectors are evolving rapidly. Here are some of the latest trends you should know about:
- Wireless Connectors: These connectors eliminate the need for physical wiring. They offer easy installation and a clean look.
- Smart Connectors: Integrated with IoT, these connectors allow for remote control and automation.
- Magnetic Connectors: These offer quick and secure connections, simplifying the setup process.
Future Developments
The future of LED light connectors is bright and full of promise. Here are some key areas of development:
- Enhanced Durability: Future connectors will be more robust, with longer lifespans.
- Energy Efficiency: New designs aim to reduce power consumption even further.
- Customization: Expect connectors that can be easily tailored to specific needs and preferences.
| Feature | Description |
|---|---|
| Wireless Connectors | Eliminate physical wiring, offer easy installation. |
| Smart Connectors | Integrated with IoT for remote control. |
| Magnetic Connectors | Quick and secure connections. |
Energy Efficiency
LED light connectors play a crucial role in enhancing energy efficiency. They ensure that LED lights perform optimally, reducing power consumption and environmental impact.
Reducing Power Consumption
LED light connectors are designed to minimize energy loss. They provide a stable connection, ensuring that the LED lights consume less power.
Using high-quality connectors can lead to a significant reduction in power consumption. This results in lower electricity bills and a smaller carbon footprint.
Below is a table showing the power consumption comparison:
| Connector Type | Power Consumption (Watts) |
|---|---|
| Standard Connector | 10 |
| Eco-friendly Connector | 7 |
Eco-friendly Connectors
Eco-friendly connectors are made from sustainable materials. They are designed to reduce environmental impact.
These connectors are recyclable, contributing to a healthier planet. They also support the efficient functioning of LED lights, further boosting energy savings.
Benefits of eco-friendly connectors:
- Lower energy consumption
- Reduced carbon footprint
- Recyclable materials
Using eco-friendly connectors is a step towards a sustainable future. They offer both environmental and economic benefits.
Connector Safety Tips
Ensuring the safety of your LED light connectors is crucial. Follow these safety tips to avoid accidents and ensure a long-lasting connection.
Avoiding Short Circuits
Short circuits can damage your LED lights and connectors. To avoid short circuits, use insulated connectors. Keep all wires properly covered.
Here are some quick tips to avoid short circuits:
- Use heat shrink tubing to cover exposed wires.
- Double-check connections before powering on.
- Keep connectors away from water and moisture.
Proper Handling
Proper handling of LED light connectors prolongs their lifespan. Avoid pulling connectors by the wires. This can cause internal damage.
Follow these steps for proper handling:
- Grip the connector itself, not the wire.
- Store connectors in a dry and cool place.
- Label connectors for easy identification.
By following these tips, you can ensure the safety and longevity of your LED light connectors.
Final Thoughts
LED light connectors play a vital role in any lighting setup. They ensure smooth connections and efficient power distribution. This section will summarize the key points and encourage experimentation.
Summary Of Key Points
- Types: There are various types like plug-in, crimp, and solder.
- Durability: High-quality connectors last longer and provide better performance.
- Safety: Proper connectors prevent short circuits and electrical hazards.
- Compatibility: Ensure connectors match the LED strips and power supply.
- Ease of Use: Some connectors are easier to install than others.
Encouragement To Experiment
Don’t hesitate to try different LED light connectors. Experimentation can lead to finding the best fit for your needs. Here are some tips to guide you:
- Start with small projects to gain confidence.
- Mix and match connectors to see what works best.
- Keep a record of your experiments for future reference.
- Always follow the manufacturer’s guidelines for safety.
Experimenting helps you understand the pros and cons of each connector. It also empowers you to make better choices for your lighting projects.
Frequently Asked Questions
What Are LED Light Connectors?
LED light connectors join LED strips or fixtures to power sources.
How Do You Install LED Light Connectors?
Align connectors with LED strip contacts, then press firmly.
Can LED Connectors Be Reused?
Yes, most LED connectors can be reused.
Which LED Connectors Are Best?
It depends on your setup; solderless connectors are popular.
Do LED Connectors Affect Brightness?
No, connectors don’t affect LED brightness.
Are LED Connectors Waterproof?
Some LED connectors are waterproof; check specifications.
How To Choose The Right LED Connector?
Match connector type to strip and power requirements.
Can I Cut LED Light Connectors?
No, cutting connectors can damage them.
Are LED Connectors Safe To Use?
Yes, if installed correctly, they are safe.
Where To Buy LED Light Connectors?
Purchase from electronics stores or online retailers.
Conclusion
Selecting the right LED light connectors ensures optimal performance and longevity of your lighting system. They offer ease of installation and reliable connections. Investing in quality connectors can save time and reduce maintenance costs. Choose wisely to enhance your lighting experience and enjoy bright, efficient illumination.
