


The Importance of Backbox for Ceiling Speakers Installations :
When installing ceiling speakers, sound quality is as important as the aesthetics. A crucial component that often goes overlooked is the backbox for ceiling speakers. This specialized enclosure mounts behind the speaker in the ceiling, enhancing performance.
The backbox for ceiling speaker significantly improves sound quality. It contains and directs audio, reducing sound leakage to adjacent rooms. This results in clearer and more immersive audio experiences. Additionally, it enhances bass response by providing a controlled environment for sound waves.
Another benefit of a backbox for ceiling speaker is its protective function. It shields the speaker from dust and debris, ensuring longevity and consistent performance. This is particularly important in spaces with high ceilings or areas prone to dust accumulation.
Installing a backbox for ceiling speaker is straightforward but crucial for optimal results. It involves mounting the enclosure behind the speaker, ensuring a snug fit. Proper installation minimizes sound distortion and maximizes audio clarity.
Professional installers often recommend using a backbox for ceiling speaker to achieve the best sound quality. However, with proper guidance, it can be a DIY project for audio enthusiasts. Understanding the types of backboxes available and their benefits is essential for making an informed decision.
In conclusion, the importance of a backbox for ceiling speakers cannot be overstated. It enhances sound quality, protects the speaker, and ensures a superior audio experience. For both audio enthusiasts and professional installers, investing in a backbox is a wise choice.
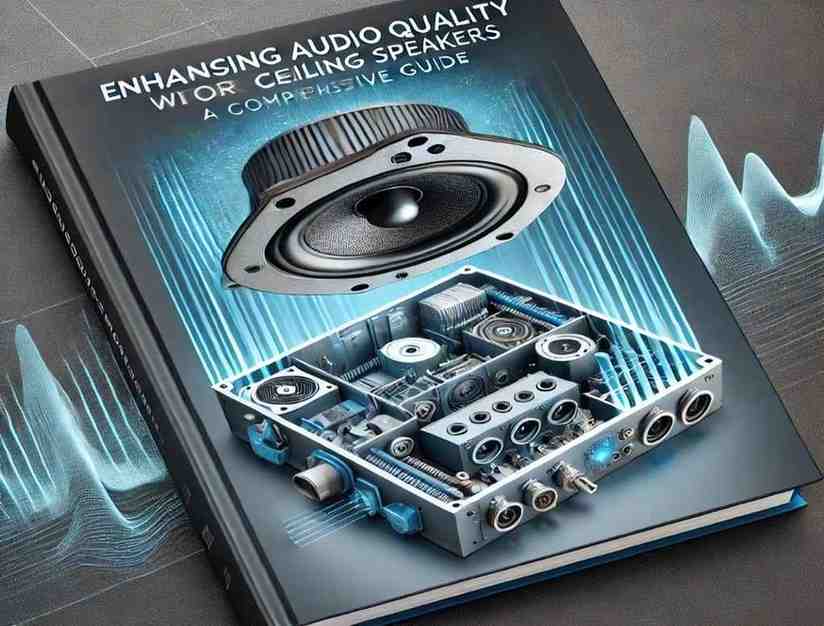
Here is the image for the book cover titled “Enhancing Audio Quality with Backbox for Ceiling Speakers: A Comprehensive Guide”. The design features a detailed illustration of a ceiling speaker with a backbox, showcasing its internal components and emphasizing acoustic benefits. The cover also includes an abstract background suggesting sound waves, styled in a sleek and tech-oriented color scheme.
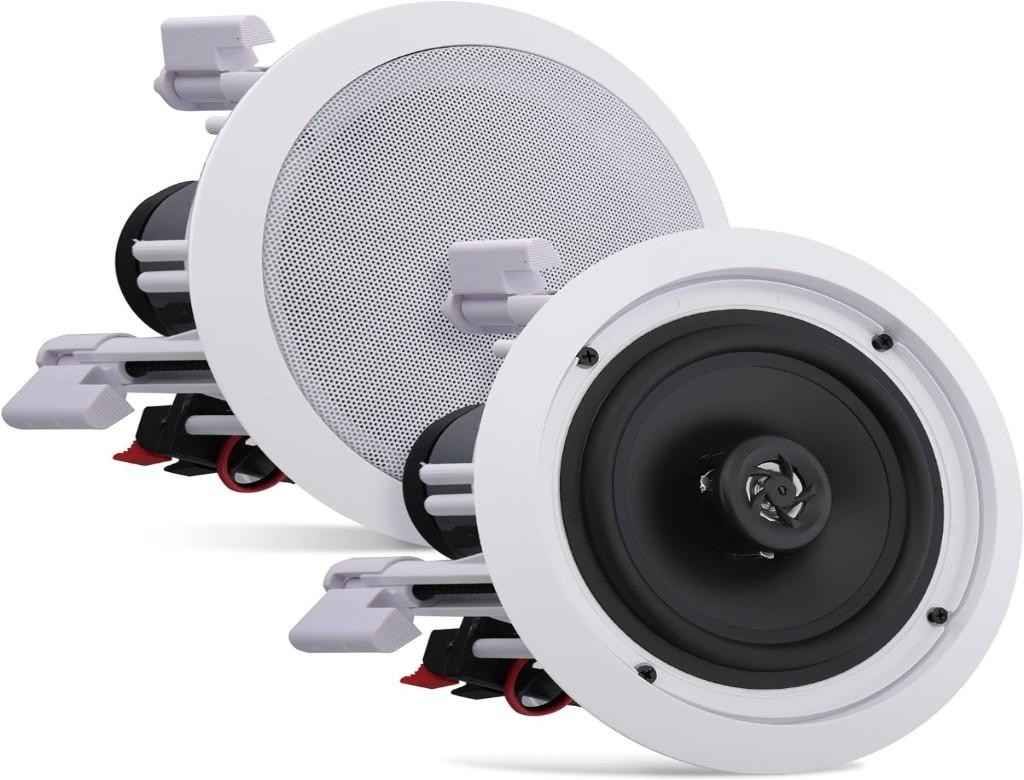
Understanding Ceiling Speaker Backboxes :
1. What is a Backbox?
A backbox is a containment box that fits behind a ceiling speaker. Its primary function is to isolate the sound from the back of the speaker from that at the front, enhancing audio clarity and preventing sound leakage to other rooms.
2. Benefits of Using a Backbox
- Improved Sound Quality: Backboxes enhance the audio performance by reducing sound distortions caused by interactions with ceiling cavities.
- Consistent Acoustic Environment: They provide a controlled environment for the speaker, ensuring consistent performance regardless of the surrounding materials.
- Reduced Sound Leakage: Backboxes prevent sound from traveling to unwanted areas, which is particularly important in multi-floor buildings.
- Protection for Electrical Components: They protect the speaker’s electrical components from dust, debris, and potential damage during construction or renovations.
3. Types of Backboxes
- Metal Backboxes V-9916M – V-9916M – Valcom Bridge and Backbox Combination for 8″ Ceiling Speaker: Typically used for fire-rated applications, metal backboxes also provide sturdy construction and excellent sound isolation.
- Plastic Backboxes Rockville Pair HC55 Black 5.25″ 300 Watt in-Ceiling Home Theater Speakers 8 Ohm: These are lighter and easier to install but are generally better suited for non-fire-rated environments.
- Custom Backboxes: Some installations may require custom-made backboxes to fit specific dimensions or to accommodate unique ceiling structures.
Planning Your Ceiling Speaker Installation :
1. Assessing Your Needs
Before purchasing backboxes for ceiling speakers, assess the ceiling space, speaker type, and acoustic goals. Consider whether the building is residential or commercial. Each type has different acoustic requirements. Evaluate the specific needs of each room to ensure optimal sound quality and performance. Proper assessment guarantees the best backbox for ceiling speakers is selected.
2. Choosing the Right Backbox
Select a backbox that matches the size and type of your ceiling speakers. Ensure the backbox for ceiling speaker is compatible with the building’s fire codes and construction materials. Proper compatibility enhances safety and performance. By choosing the right backbox for ceiling speaker, you ensure optimal sound quality and adherence to safety regulations.
3. Acoustic Considerations
Evaluate the acoustic properties of the room before installing the backbox for ceiling speaker. Hard surfaces, high ceilings, and large spaces can affect sound quality. You may need additional acoustic treatment to optimize audio performance. Proper evaluation ensures the backbox for ceiling speakers functions effectively, providing the best possible listening experience.
Installation Process for Ceiling Speaker Backboxes :
1. Tools and Materials Needed
To install a backbox for ceiling speaker, start by preparing the necessary tools and materials. You’ll need a stud finder, drill, screws, acoustic sealant, and insulation material, if required. These items are essential for a smooth installation process.
First, use the stud finder to locate ceiling joists. This ensures the backbox for ceiling speakers is securely mounted. Mark the locations with a pencil. Next, measure and cut the ceiling opening according to the backbox dimensions. Ensure the opening is precise to avoid gaps.
With the opening ready, position the backbox for ceiling speaker within the cutout. Use a drill to secure the backbox to the ceiling joists, ensuring it is firmly attached. Screws should be used to provide stability and support.
Applying acoustic sealant around the edges of the backbox for ceiling speaker is crucial. This step prevents sound leakage and enhances audio quality. If your setup requires it, place insulation material inside the backbox. This further improves sound containment and clarity.
In conclusion, preparing the right tools and materials is vital for installing a backbox for ceiling speakers. By following these steps and using the appropriate equipment, you can ensure a secure and effective installation, leading to optimal audio performance.
2. Installation Steps
- Locating the Installation Site: Use a stud finder to locate joists in the ceiling and mark the spot for the speaker and backbox.
- Cutting the Hole: Carefully cut the hole in the ceiling where the backbox will be installed, using the dimensions recommended by the speaker manufacturer.
- Mounting the Backbox: Secure the backbox into place using screws. If applicable, apply acoustic sealant around the edges to enhance sound isolation.
- Wiring the Speaker: Run the speaker wires through the designated ports in the backbox, ensuring they are properly insulated and secured.
- Installing the Speaker: Place the ceiling speaker into the backbox and secure it as per the manufacturer’s instructions.
3. Post-Installation Testing
Once the installation of your backbox for ceiling speakers is complete, it’s crucial to perform post-installation testing. Begin by powering on the speakers and playing a variety of audio tracks. This helps you evaluate the sound quality and identify any issues.
Listen carefully for any distortions or irregularities. If you notice any, inspect the backbox for ceiling speaker for gaps or loose fittings. Ensure the backbox is properly sealed and securely mounted, as this can significantly impact sound quality.
Next, adjust the speaker settings to optimize performance. Fine-tuning the bass, treble, and balance can enhance the overall audio experience. Additionally, consider the room’s acoustics. The placement of furniture and the presence of soft materials like carpets and curtains can affect sound projection.
If necessary, make adjustments to the room layout or add acoustic treatments to improve sound clarity. Testing the backbox for ceiling speakers in different scenarios, such as varying volume levels and types of audio, ensures comprehensive evaluation.
In conclusion, post-installation testing is a vital step in the installation process of a backbox for ceiling speaker. By thoroughly assessing the sound quality and making necessary adjustments, you can achieve optimal audio performance and enjoy a superior listening experience.
Troubleshooting Common Installation Issues :
1. Sound Distortions
If you notice sound distortions, the backbox for ceiling speakers might have issues. First, check for any gaps or loose fittings around the backbox for ceiling speaker. Ensuring the backbox for ceiling speaker is properly sealed and insulated is crucial. Gaps can allow sound to leak, causing distortions and reducing audio quality. Additionally, loose fittings can result in vibrations that distort sound. Proper sealing and insulation of the backbox for ceiling speakers will enhance sound clarity. Always double-check the installation to ensure optimal performance and minimize sound distortions. Addressing these issues promptly can greatly improve your audio experience.
2. Wiring Problems
Improper wiring can lead to performance issues with your backbox for ceiling speaker. Thoroughly verify all connections to confirm they are firmly secured. During installation, ensure the wires connecting the backbox for ceiling speakers are not pinched or damaged. Pinched or damaged wires can cause sound distortions or even complete audio failure. Additionally, proper routing of the wires within the backbox for ceiling speaker is essential for maintaining sound quality. Always inspect the wiring thoroughly after installation to confirm that the backbox for ceiling speaker is functioning correctly. Addressing wiring issues promptly can prevent long-term problems and ensure optimal audio performance.
3. Physical Alignment Issues
Misalignment of the speaker within the backbox for ceiling speakers can significantly affect sound projection. To address this, ensure the speaker is mounted correctly and uniformly within the backbox for ceiling speaker. Proper alignment is crucial for optimal audio performance. If the speaker is not centered, sound waves may not project evenly, causing distortions. During installation, carefully position the speaker to fit securely within the backbox for ceiling speaker. Additionally, check that the mounting brackets are tight and stable. Correct alignment within the backbox for ceiling speakers ensures the best possible sound quality and a seamless listening experience.

Maintaining Your Ceiling Speaker System :
1. Routine Checks
Regular maintenance is essential for keeping your ceiling speaker system in optimal condition. Regularly inspect your system for signs of wear or damage. Begin by checking the integrity of the backbox for ceiling speaker. Look for any cracks or loose fittings that could affect performance. Additionally, inspect the condition of the speaker cones to ensure they are not damaged or deteriorating. The backbox for ceiling speakers plays a crucial role in protecting these components, so its condition is vital.
Next, ensure the stability of the mounting. Loose or unstable mounts can lead to sound distortions and potential damage to the speaker and backbox for ceiling speaker. Tighten any loose screws and ensure the speaker is securely positioned within the backbox.
Moreover, dust and debris can accumulate over time, affecting sound quality. Gently clean the backbox for ceiling speaker and the speaker components to maintain optimal performance. By conducting these routine checks, you can ensure your ceiling speaker system continues to deliver high-quality audio and remains in excellent working condition for years to come.
2. Cleaning and Dusting
Regular cleaning is essential to maintain the performance of your ceiling speaker system. To ensure sound clarity, keep the speaker grilles clean and dust-free. Dust and debris can accumulate on the grilles and affect audio quality. Use a soft brush or cloth to gently clean the speakers and backbox for ceiling speakers.
When cleaning, start by removing the speaker grilles. Carefully wipe them with a soft cloth to remove dust and dirt. Next, gently clean the speaker cones and the backbox for ceiling speaker. Avoid using harsh chemicals or abrasive materials that could damage components.
Additionally, inspect the backbox for ceiling speakers for any dust buildup. Regularly cleaning the backbox ensures that it continues to provide a controlled environment for the speaker, enhancing sound quality. By maintaining a dust-free backbox for ceiling speaker, you prevent potential audio distortions and prolong the life of your system.
In conclusion, routine cleaning and dusting are crucial for maintaining your ceiling speaker system. By taking care of the speaker grilles, cones, and backbox for ceiling speakers, you ensure superior audio performance and longevity of your equipment.
3. Professional Assessments
For high-end audio setups or complex environments, scheduling periodic assessments by an audio professional is highly recommended. Professional assessments can ensure your system, including the backbox for ceiling speakers, is performing optimally. Experts can identify issues that might not be apparent during routine checks.
An audio professional will thoroughly inspect the backbox for ceiling speakers, ensuring there are no structural weaknesses or installation problems. They will also test the overall sound quality and make necessary adjustments. This ensures that the backbox for ceiling speakers functions correctly and enhances the system’s performance.
Moreover, professionals can provide valuable advice on upgrades or modifications. If your environment changes, such as room renovations, a professional can reassess the setup. They will ensure the backbox for ceiling speakers and other components are still optimally positioned and functioning.
Regular professional assessments can help catch minor issues before they escalate into major problems. By addressing potential concerns early, you can maintain the longevity and quality of your ceiling speaker system. Investing in professional assessments for your backbox for ceiling speakers is a wise choice for any audio enthusiast seeking the best sound experience.
In conclusion, professional assessments are crucial for maintaining high-end audio systems. Ensuring the backbox for ceiling speaker and other components are in top condition guarantees superior performance and longevity.
FAQs for Backbox for Ceiling Speaker :
What is a backbox for ceiling speakers?
A backbox is an enclosure for ceiling speakers. It improves sound quality by containing and directing the audio.
Why do I need a backbox for my ceiling speakers?
A backbox reduces sound leakage and enhances audio performance. It provides a controlled environment for sound waves.
Can I install a backbox myself?
Yes, you can install it yourself. For the best results and safety, professional installation is highly recommended.
What materials are backboxes made of?
Backboxes are typically made of MDF, plastic, or metal. The material affects sound quality and durability.
How does a backbox improve sound quality?
It reduces sound transmission to adjacent rooms and improves bass response. This enhances overall audio clarity.
Are backboxes compatible with all ceiling speakers?
Not all ceiling speakers need a backbox. Check your speaker model’s specifications to ensure compatibility.
Do backboxes require maintenance?
Minimal maintenance is needed. Regularly check for any dust buildup or damage to maintain sound quality.
Where can I purchase a backbox for ceiling speakers?
Backboxes are available at electronics stores and online retailers. Ensure you choose one that fits your speakers.
Can I use a backbox in any ceiling type?
Yes, backboxes can be used in various ceiling types. However, ensure proper installation to avoid any issues
Conclusion : Maximizing Audio Performance with Backboxes
Installing a backbox for ceiling speakers can significantly enhance the audio experience. By improving sound quality, minimizing leakage, and protecting the system’s integrity, backboxes offer numerous benefits. Understanding the types of backboxes available is crucial. Different materials, like MDF, plastic, and metal, affect sound quality and durability.
When choosing a backbox for ceiling speakers, ensure it fits your speaker model. Ensuring compatibility is crucial for optimal performance. Professional installation is recommended for optimal performance, but it can be a DIY project with proper guidance. Proper installation procedures must be followed to ensure the backbox functions effectively.
A backbox for ceiling speaker contains and directs audio, reducing sound transmission to adjacent rooms. This enhances overall audio clarity and bass response. The controlled environment a backbox provides improves the listening experience, making it richer and more immersive.
Maintenance of a backbox for ceiling speakers is minimal but important. Regularly check for dust buildup and any damage to maintain sound quality. Ensuring the backbox is intact and clean will prolong its effectiveness and the life of your speakers.
Purchasing a backbox for ceiling speaker is easy. They are available at electronics stores and online retailers. Always refer to the manufacturer’s guidelines to select the correct size for your speakers.
In conclusion, maximizing audio performance with a backbox for ceiling speaker is achievable. By choosing the right backbox, following proper installation procedures, and maintaining the system, you can enjoy superior sound quality. Investing in a backbox for ceiling speakers is a smart decision for any audio enthusiast looking to enhance their listening experience.
